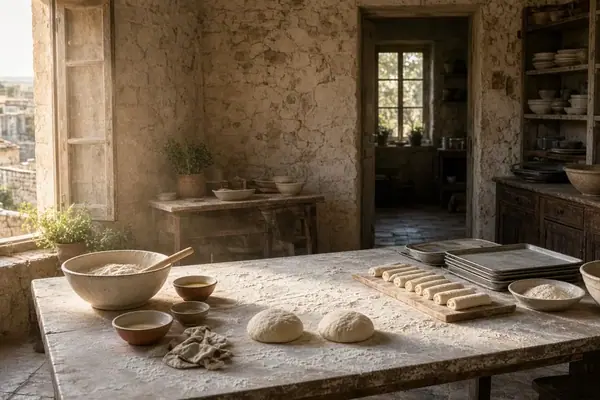
Sicilian Tomasini: Thin Dough Wrapped Around Savoury Spirals
Tomasini are savoury Sicilian rolls formed by wrapping thinly stretched, enriched semolina dough around a seasoned filling; this version pairs drained ricotta with pan-cooked pork sausage. When pulled from the oven at the right moment, they offer a striking contrast between a crisp, golden exterior, tender inner dough layers, and a creamy, savoury centre. Unlike a pastry case that receives a blind bake before its filling ever touches the crust, a tomasino bakes its dough and dairy together in a tight coil, meaning every step of preparation must manage moisture and heat simultaneously.
Protecting those delicate layers dictates the entire kitchen schedule. You mix and knead the dough first, then set it aside to rest covered while you drain the ricotta and cook the sausage. Overlapping the dough rest with the ricotta draining and sausage cooling keeps the active, hands-on work to roughly 45–60 minutes, even though the total clock time stretches longer to let the cheese shed its liquid. By the time the gluten relaxes, the filling is cold and spreadable, leaving you ready to stretch, fill, shape, cut, and bake in one continuous run.
Rest the Semolina Dough Before Stretching It Thin
Resting decides whether your enriched semolina dough stretches into a wide, translucent sheet or tears under your knuckles. Kneading builds the initial gluten network and elasticity, while a covered rest allows that tension to relax so the dough can be coaxed outward rather than forced. This stretching method depends entirely on finely milled semolina (semola rimacinata), because coarse semolina grains interrupt the gluten matrix and cause the sheet to tear long before it becomes translucent.
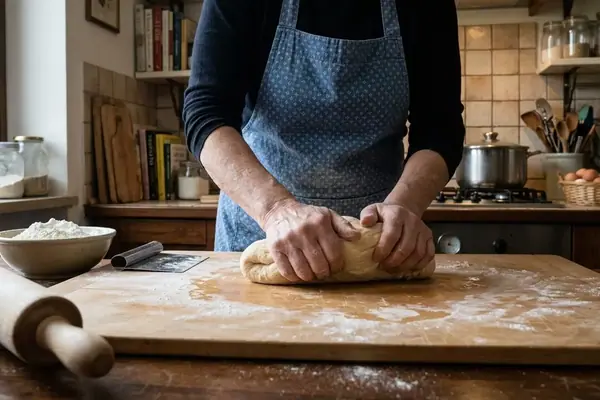
Watch the dough transform beneath your hands as you work it on the bench. It begins slightly rough and patchy, showing drier spots where the flour has not yet fully absorbed the liquid. Knead for 8–12 minutes by hand until the surface turns from grainy to smooth and satiny, feeling evenly hydrated and springy enough to slowly fill back a shallow thumbprint.
Once kneaded, cover the dough with an upturned bowl or plastic wrap and let it rest for 30–60 minutes at room temperature. Exposed dough quickly forms a dry skin that cracks the moment you begin pulling it wide. When the rest is complete, dust your work surface lightly and stretch the dough from the centre outwards until you can see light—or the shadow of your hand—through the sheet. If the dough fights you and springs back mid-stretch, cover it and grant it another 10–15 minutes of rest before continuing. Should you spot a small tear, gently lift the two edges and pinch them together right away; never attempt to patch a tear after the filling is spread.
Drain the Ricotta so the Filling Stays Inside the Layers
Fresh ricotta carries loose whey that looks harmless enough sitting in its tub. Once that liquid is rolled inside a thin sheet of dough, however, it steams and softens the pastry layers from within, seeps out at the seams, and leaves the middle of the spiral damp. Draining is purely a physical preparation step to remove free whey rather than a fermentation or preservation process, and it is what keeps the interior layers distinct.
Set a fine sieve over a deep bowl, line it with muslin if your ricotta is particularly soft, and leave it to drain in the refrigerator for 2–4 hours. If you are working with very wet, fresh deli ricotta, let it drain overnight for 10–12 hours. Start the draining process as soon as your dough goes under cover, and keep both the ricotta and the finished filling refrigerated until the exact moment you are ready to spread it.
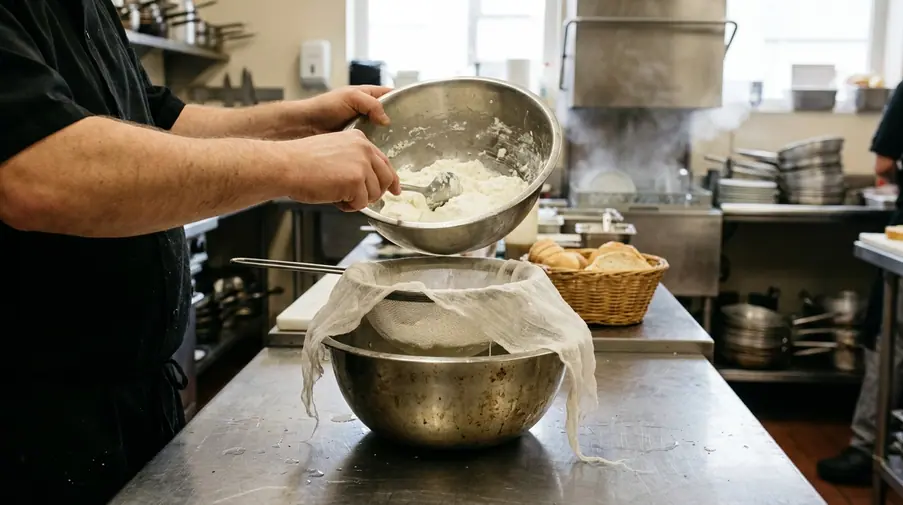
You are looking for a texture that is soft and spreadable, holding a gentle peak on the back of a spoon with no loose liquid gathering around it in the bowl.
Prepare the Sausage Before Seasoning the Ricotta
During an early test batch in my kitchen, I tried rolling raw sausage meat straight into the ricotta to save a pan, and the spiral failed in two ways: the raw pork released heavy fat and juices directly into the dough coils, and the exterior crust browned before the meat at the centre was safely cooked. Pre-cooking the sausage solves both problems at once.
Strip the casings from the sausages and break the meat into small, pea-sized crumbles measuring about 5–8 mm across. Larger chunks create stubborn lumps that catch on the palette knife and puncture the stretched semolina sheet. Set a frying pan over medium heat and cook the crumbles for 8–10 minutes until no pink remains and the pork reaches 71°C on an instant-read thermometer.
Tip the cooked sausage onto a plate lined with paper towel to drain off the rendered fat, then let the meat cool for 15–20 minutes before combining it with the chilled cheese. Mixing warm sausage into cold ricotta loosens the dairy immediately and makes the mixture runny. Once combined, taste a spoonful of the filling before reaching for the salt cellar; cured pork sausages often carry plenty of seasoning on their own and require only a few grinds of black pepper.
Spread Lightly, Roll Evenly and Shape the Spirals
Shaping tomasini requires balancing the fragility of the stretched dough against the weight of the filling. Once the semolina sheet is thin enough for light to show through, it can carry only 3–5 mm of ricotta and sausage; any thicker, and the spiral bulges, the layers separate, and filling leaks from the cut faces. Heavy patches of cheese create lopsided rolls that bake unevenly on the tray.
- Spread the filling evenly: Sweep the chilled ricotta and sausage mixture across the stretched dough in an even layer 3–5 mm thick, leaving a clean border of something like 1.5–2 cm along the far edge for sealing.
- Roll without tension: Lift the near edge of the dough and roll it forward into a cylinder using a light touch. If filling squeezes out ahead of the roll, scrape back the excess on the next stretch of dough instead of pulling the log tighter. If the dough resists as you roll, cover the sheet for somewhere around 10 minutes before continuing.
- Slice cleanly: Cut the finished log into individual portions 3–4 cm thick. Thinner slices tend to lose their spiral structure when lifted, while thicker slices take too long to set in the centre.
- Arrange with breathing room: Place the cut spirals cut-side up on a parchment-lined baking tray, leaving 3–4 cm between rolls so hot air can circulate and brown their sides as they expand. If a cut roll looks squashed from the knife, coax its round shape back gently with your fingers without pressing it flat.
Bake Until the Bases Crisp and the Inner Dough Sets
Surface colour across the top of the tray is a deceptive cue on its own. In the oven, the exposed spirals take on colour quickly, the bases crisp more slowly against the tray, and the innermost coil of dough sets last of all. Start with an oven fully preheated to 200°C (180°C fan-forced) for 15–20 minutes before the tray goes in, and always bake on parchment paper so the bases release cleanly without tearing.
Bake the tomasini for 22–30 minutes until the top spirals are deep golden and the underside of a lifted roll is evenly browned. If your oven runs hotter on one side, rotate the tray front to back at the 15-minute mark, give or take, to keep the colouring uniform.
Inspecting the Centre Coil
To verify true doneness, pull apart a roll taken from the dead centre of the tray. A glossy, tacky band coiled against the ricotta in the centre tomasino is underbaked inner dough—drained ricotta stays creamy, whereas that sticky, translucent ribbon shows the tray needs more oven time. Properly baked inner dough looks matte and flakes cleanly into distinct layers. If you spot underbaked bands, return the tray to the oven for 4–6 minutes and check again.
Once baked through, transfer the rolls to a wire cooling rack for 5 minutes, more or less, so trapped steam can escape from the bases rather than condensing underneath them on the hot pan.
Cut One Tomasino Before Bringing the Tray to the Table
The final quality check belongs to a single roll from the middle of the tray, which absorbs heat more slowly than the corner pieces. Let the tomasini rest on the rack for 5–10 minutes before cutting into your test roll; within the first couple of minutes out of the oven, the filling is still too piping hot to show its true, settled texture.
Slice straight through the middle and examine the cross-section. You should see distinct, matte coils of semolina dough, creamy ribbons of ricotta holding their place between the layers, pea-sized sausage crumbles distributed evenly from edge to centre, and a golden base that resists gently when pressed with the blade. Bring the platter to the table while the rolls are warm—ideally within 30–45 minutes of baking, before lingering moisture from the filling softens the crisp outer crust.
When you set your own schedule to bake a tray of tomasini, will you drain a wet deli ricotta overnight for maximum structure, or time a two-hour refrigerator drain alongside your afternoon dough rest?