Quick Nav
- The calm case for blind baking
- When pastry needs a full or partial blind bake
- What goes wrong before the oven
- The small kit and the staged method
- Fixes, limits, cooling, and final cues
The calm case for blind baking
A tart shell can look betrayed by the oven: shrunken sides, a puffed base, a pale underside, or that particular sogginess that makes the first slice slump. I have seen good bakers treat blind baking as if it were a punishment for choosing custard.
It is not. To blind bake pastry is simply to bake an empty pastry shell before the filling goes in. Sometimes you bake it until fully crisp. Sometimes you only set it enough to survive a second bake with a wet filling.
In the Ms.Gourmet kitchen, I think of it as structure before softness. The shell does its work first, then the lemon curd, ricotta, quiche custard, ganache, or fruit gets its turn. That order suits sweet tarts, custard pies, quiches, and the Mediterranean-style pastry shells I compare often in Maltese and Sicilian baking.
In practice: Blind baking is not a trick. It is a way to give pastry a head start before moisture, eggs, cream, fruit, or curd ask too much of it.
When does pastry actually need blind baking?
Start with the filling, not the recipe name. Ask three questions: is the filling already cooked, will it go back in the oven, and how wet is it?
Full blind bake
Use a full blind bake when the filling will not bake again. Lemon curd, pastry cream, chocolate ganache, fresh fruit fillings, and ice cream pies all ask for a shell that has already finished its oven work. The base should be crisp before anything cool or creamy touches it.
Partial blind bake
Use a partial blind bake when the filled tart returns to the oven. Quiche, ricotta tart, custard pie, pumpkin-style fillings, and frangipane need a base that has set but has not browned so far that the second bake takes it too dark. In practical terms, a partial blind bake leaves the pastry pale enough to handle roughly another 25 to 45 minutes once filled.
Skip it sometimes
Rustic galettes, double-crust pies, and long-baking fruit fillings often do not need blind baking. Their pastry and filling cook together, and the shape is forgiving.
Blind bake or not? A quick filling guide| Filling example | Already cooked? | Goes back in oven? | Blind bake |
|---|---|---|---|
| Lemon curd, ganache, fresh fruit, ice cream | Yes or no-bake | No | Full blind bake |
| Quiche, ricotta tart, custard, pumpkin, frangipane | No or partly cooked | Yes | Partial blind bake |
| Galette, double-crust pie, long-bake fruit pie | No | Yes, with pastry | Usually unnecessary |
One caution: a deep custard pie can still weep into pastry after a partial blind bake if the filling sits more than about 4 cm deep over a thin base. In that case, choose a sturdier crust and do not rush the chill.
What usually goes wrong before the oven even starts?
Shrinkage usually begins at the bench, not in the oven.
If the butter is warm, the dough stretched, the corners thin, the chill shallow, or the sides under-supported, heat only reveals the problem. Dough pulled across a tin carries tension. As the fat melts and the pastry relaxes, it pulls back. Stretched corners can retreat 3 to 5 mm during the first ten minutes or so of heat.
Press the pastry into the tin instead of dragging it. Lift the overhanging edge slightly, let the dough fall into the corner, then press gently with a knuckle or a small scrap of dough. I leave roughly 1 to 2 cm of overhang above the rim before baking and trim after the shell has set. It looks untidy for a while. That is fine.
Important: Thin corners brown early, slump easily, and crack first. Spend the extra minute there before you even think about weights.
The small kit that makes blind baking easier
You do not need a pastry school trolley. You need a few steady things.
- Tart tin or pie dish
- Rolling pin
- Fork
- Baking paper
- Pie weights, dried beans, or rice
- Baking tray
- Cooling rack
The baking tray matters more than many home bakers expect. It helps heat the base more directly and gives you a firm platform for moving a fragile shell in and out of the oven.
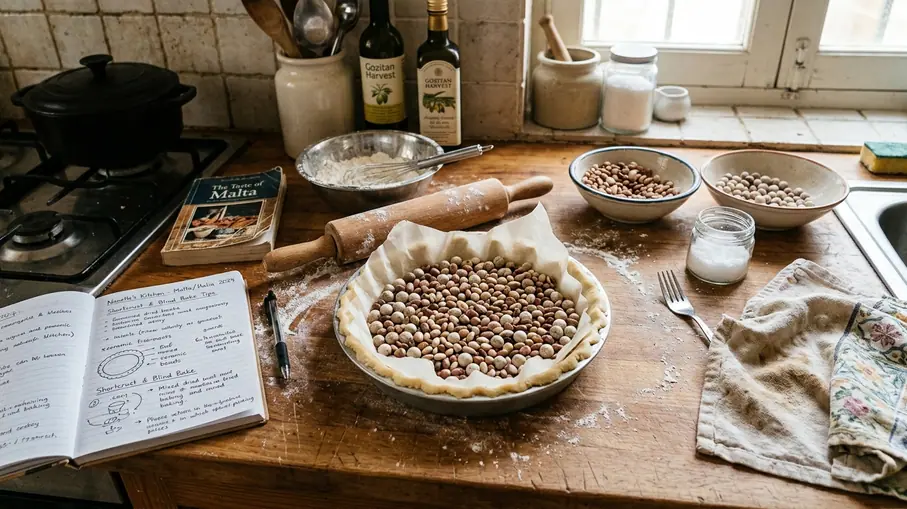
Weights behave differently. Ceramic beads sit heavy and even. Dried beans pack the sides cheaply. Rice reaches fluted corners well, though it spills more readily when you lift the paper out. A standard 23 cm tart shell needs enough weights to reach about two-thirds up the sides, not just a polite single layer over the base.
Beans or rice kept for weighting stay useful for many bakes, but after that first roasting they stop being fit to cook for dinner.
How to line, chill, dock, and weight the shell
This is the part where calm technique saves the pastry.
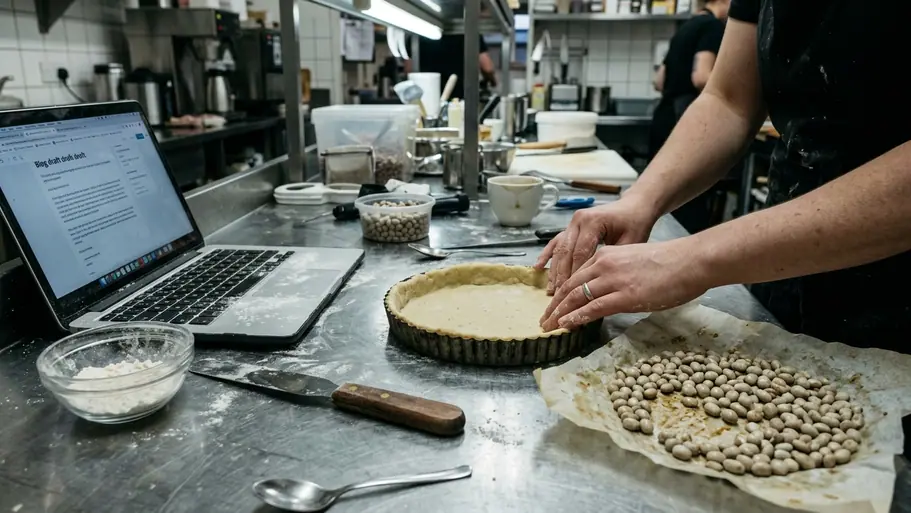
- Roll evenly. Aim for an even sheet rather than a heroic thin one. Patch thick and thin spots before the dough reaches the tin.
- Fit without stretching. Lower the pastry into the tin, lift the edges, and press into the corners. Do not pull it across the rim.
- Chill until firm. Chill the lined shell until the fat feels firm to the touch, usually 25 to 40 minutes in the fridge or about 12 to 15 minutes in the freezer.
- Dock when suitable. Use shallow fork holes spaced roughly 2 to 3 cm apart. Docking lets steam escape, but the holes should not tear through the pastry.
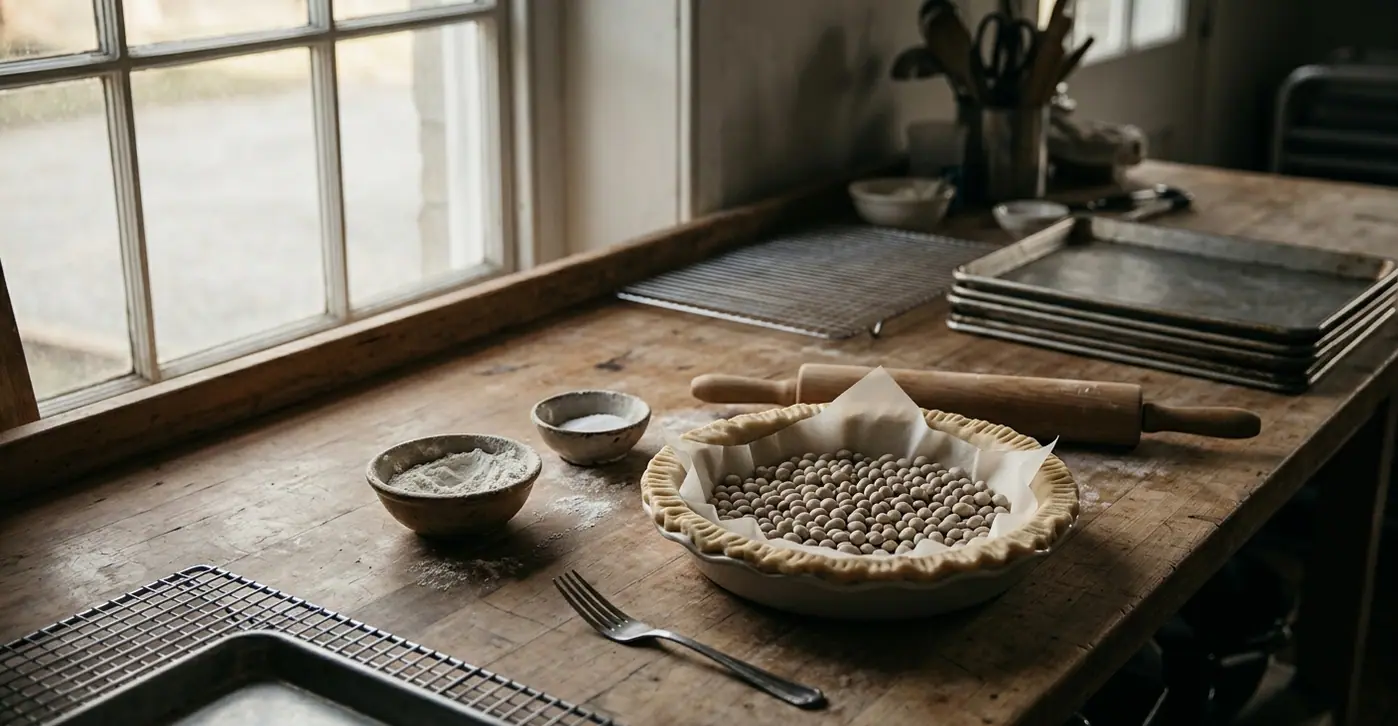
- Line with crumpled paper. Crumple the baking paper, open it out, and press it gently into the shell so it reaches the sides and corners.
- Add enough weight. Fill the paper-lined shell with beads, beans, or rice up the sides, not just across the base.
A shell lined with paper laid flat instead of crumpled leaves the fluted corners unweighted, and those exact corners slump first. Rice slides into fluted corners that ceramic beads can bridge over, but it asks for a steadier hand when the paper comes out.
Field Note: Skip docking entirely for very loose custard or liquid fillings, where any hole becomes a leak no second bake will seal.
How do you know when to remove the weights?
The clock can help, but it should not command.
Look at the sides first. The weights come out when the side walls look set, the pastry has lost its raw shine, and the rim has started to colour lightly. At 190°C, under typical conditions, that often happens after 15 to 20 minutes, but tins and ovens shift the cue. The same recipe baked in a dark metal tin browns the base faster than in a ceramic dish, so the de-weighting point may arrive earlier.
Once the weights come out, return the shell to the oven. The base still needs direct heat. For a partial bake, give it a further 5 to 10 minutes. For a fully crisp shell, give it about 10 to 15 minutes, watching for a dry, matte surface and even colour.
A tactile check
Touch the side very lightly with the back of a spoon. It should feel set rather than doughy. If the wall still looks soft or glossy, the weights are not finished doing their job.
Panic fixes: shrinking, puffing, cracking, and pale bases
Here is the part nobody writes neatly on the recipe card.
Shrinking
If the sides have slipped down, you cannot rebuild their full height mid-bake. Serve the tart shallow if it suits the filling, then change the next bake: do not stretch the dough, chill longer, leave 1 to 2 cm overhang, and trim after the shell sets.
Puffing
Puffing comes from steam pockets and under-weighting. If the base rises after the weights come out, press it down gently with the back of a spoon while it is still hot. Next time, dock more carefully where the filling allows, and use enough weights to support the sides.
Cracking
A hairline crack can often be patched. Press in a pea-sized scrap of raw dough during the second bake, then bake a further 4 to 6 minutes to seal it. If the recipe suits the flavour and finish, a light brush of egg wash can also seal tiny gaps before filling.
Pale bases
A pale base usually needs more time after the weights come out. If the rim is already browning, place a loose foil collar over the edge. That can buy the base another 8 to 12 minutes without pushing the rim too far.
What this method can and cannot promise
This method is for home-baked shortcrust, sweet pastry, and similar tart shells. It is not a guide to laminated puff pastry, nor to commercial production where dough temperature, humidity, and batch size behave differently.
The cues are reliable enough to narrow the common failures, not to make every recipe behave the same way. A fan oven, a dark metal tin, and a warm Melbourne summer kitchen will each shift your timing, so treat the figures here as starting points to adjust after a bake or two.
Gluten-free pastry and very buttery doughs usually want a longer chill, closer to 45 to 60 minutes, before they go into the oven. Deep pie dishes also need gentler lining because the sides carry more weight. During practice, I find those doughs punish haste more than they punish inexperience.
Important: If your room is warm and the dough feels soft before baking, stop and chill it again. The oven cannot correct melted fat and stretched sides.
Cooling, filling, and make-ahead timing
Blind baking does not finish when the oven door opens. Steam still has a say.
Move the shell to a rack and let air reach the base. A shell left in its tin traps steam against the underside and softens the crispness you just built. For cream, citrus, custard, or ice cream fillings, cool the shell on a rack for at least 30 to 45 minutes before filling.
A fully baked, completely cooled shell stored airtight keeps usable for 2 to 3 days, though humid weather shortens that window. In a sticky summer kitchen, even an airtight container may not stop a shell softening past a day, so bake closer to serving if texture matters.
For Maltese and Sicilian-style sweets
Ricotta fillings, citrus creams, and nut pastes all test the pastry in different ways. Ricotta brings moisture and weight. Citrus curd brings acidity and softness. Nut fillings often bake again, so a partial blind bake gives the shell support without taking it too dark before the second stage.
Bottom line: blind bake without panic
Run the method like a short checklist.
- Choose full blind baking for no-bake fillings such as lemon curd, ganache, pastry cream, fresh fruit, and ice cream.
- Choose partial blind baking for quiche, ricotta tart, custard pie, pumpkin-style filling, and frangipane.
- Fit pastry into the tin by pressing, not stretching.
- Chill until the fat feels firm and the dough has relaxed.
- Dock only when the filling will not leak through the holes.
- Use enough weights to support the sides, about two-thirds up a 23 cm tart shell.
- Remove weights when the sides are set, the shine has gone, and the rim has just begun to colour.
- Return the shell to the oven so the base can dry and crisp.
That is the quiet rhythm of it: line, chill, support, bake in stages, cool properly. Blind bake with those cues in mind and the tart shell stops feeling like the risky part of the recipe.